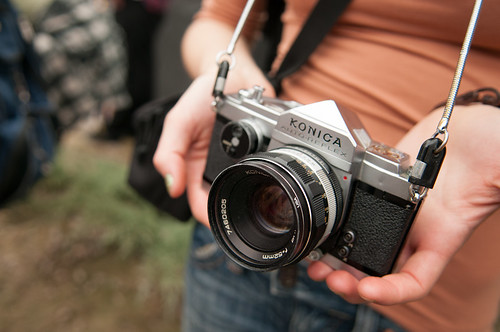
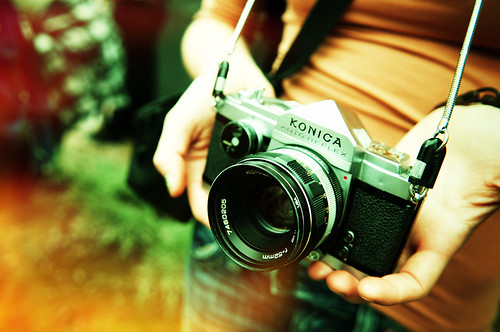
The original:
To start off, Exposure 4 is on the pricey side. $259 or so for the brand new bundle. The nice thing is that you get the plugin for both Lightroom and Photoshop, so you can use it in either environment. But still, considering the new Lightroom 4 is only $150 for a new user, and about $80 for an upgrade, $259 for this effects plugin seems high to me. However, having said that, the software itself is very snappy, and gives you hundreds of options in adding that bit of nostalgic flare to your otherwise sterile digital photos. Many purists would argue that you could just shoot film to get that film look… but this point is becoming increasingly moot considering the rapid demise of film stocks (I'm looking at you, Kodak!), and the decreasing prevalence of local labs that will process anything but 35mm C-41 films. It's tough enough finding labs that will process E-6 or true black and white film, let alone ones that will do these in 120 size. That's like finding a unicorn in a hay stack... or something. Anyways, I digress.
Exposure 4 - The pros: As in the previous version, every major film stock and look you want to emulate is built in and ready to tweak to your liking. They've now even broken out film stocks like Kodachrome by version or era (that emulsion went through a huge number of changes during it's 70+ year run, and you can pick and choose the period of Kodachrome you want to simulate). The factory settings let you choose from Color print and slide films, Polaroids (just the colour and look, not the white borders), Vintage processes like daguerrotypes and calotypes, Cross processing of various print and slide films, Black & White films, and a good handful of Lo-fi effects. Essentially, if you want to replicate a the look of your favourite film stock or process, the factory presets do a pretty good job with just one click.
In version 3, you had further control over colour, tone, focus (blur, halation, etc), grain, and 'age' (dust, scratches, vignetting). These have all been retained in version 4, and most have received minor upgrades in terms of how you tweak them. The 'Age' function is where I noticed a large addition of functionality. No longer are you limited to adding some not terribly convincing dust and scratches, but now they've added things like light leaks, paper textures, a limited set of borders, and a couple other things that give you full control over how truly aged, vintage, or lo-fi you want your photo to look. The dust and scratches are far more convincing in this version (they look much more true to life like scratches you would see on mistreated negatives) than the previous version, and the light leaks options offer an endless array of randomly generated leaks to give even a Holga toting hipster some pause. If you thought Tumblr was full of faux vintage photos before, wow, are you ever in for it going forward.
The biggest beef I had with Exposure 3 was that when you launched the plugin, you had to choose upfront between either making B&W edits, or colour edits. You couldn't flip back and forth between these without relaunching the plugin. Apparently, Alien Skin has grown a bit of common sense and realized how incredibly stupid and annoying that was, so they have integrated B&W and colour into one module. YAY! For me, that alone would be worth the upgrade.
On the con side, I still wish they had included something like a history or state palette, so that you could easily compare various effects that you had applied, or jump back to previous edits/ changes made. Sure, you can click back and forth between any number of factory preset options as comparison, but there is no fast way to do this if you add your own tweaks to the presets, outside of saving each tweak as a custom user preset. Not terribly handy if you just want to quickly compare your work. I also dislike that there is still no way to add multiple effects to a photo in the plugin. For example, in the 'age' menu, you can choose between adding 'dust and scratches' and 'light leaks'. But there is no custom way to add both to a photo, except where a factory preset with both of these is present. And in those cases, you can't independetly control one vs. the other. Minor annoyance, but still.
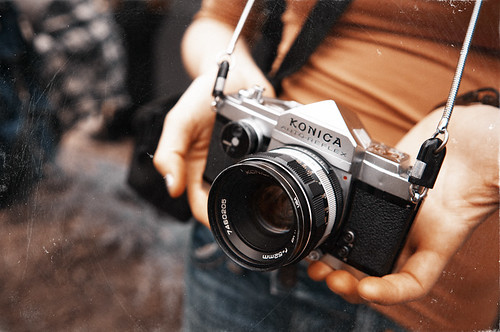
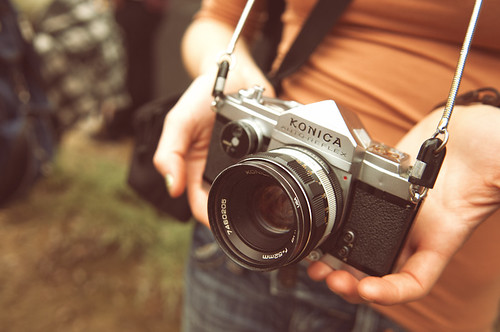
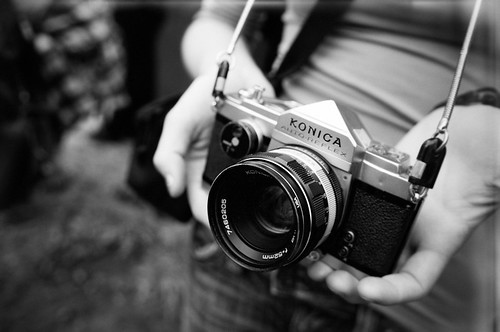
I could go on and on for pages about all the other functions and features of Exposure 4, but nothing beats letting photos speak for themselves. Here are just a few examples I generated from the above raw photo I took in Montreal a couple weeks ago of a girl's film camera.
The edits: Dust and scratches, vintage low contrast, cross processed Provia w/ light leaks, and lo-fi b&W.
Overall, Exposure 4 builds solidly upon the successes of 3, while taking into account some of the flaws of the previous version, and ultimately takes a few of the features to new heights. If you are anything like me (ie: averse to spending hours in Photoshop just to edit one single photo), then Exposure 4 is a great option to add a bit of filmy impact to your images. Just, please don't over do it. The world is already chock full of instagram and hipstamatic shooters pretending to be 'art' photographers. You know the cliche, too much of a good thing…
There's something wrong with the colors on your pictures.
ReplyDeleteYeah, especially the last picture. The colours are missing.
ReplyDeleteThis comment has been removed by the author.
ReplyDelete