Showing posts with label Tutorials. Show all posts

Saturday, December 12, 2015

Gift Idea for the Frugal Photographer - Phototransfers

With only thirteen beers left in your advent calendar to drink, it may have suddenly dawned on you that there are less than 2 weeks to Christmas. Queue the mass gift shopping panic! Fortunately, frugal photographer Mach has your back, and I've got a great little photo gift idea for you that is cheap, creative, and crafty. So sit back, grab a beer, and welcome to my little tutorial on Phototransfers.

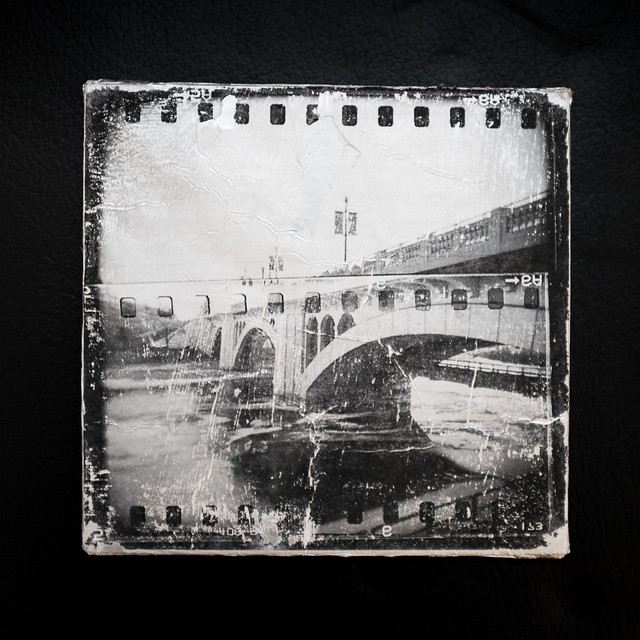
The end result will be a unique (and likely aged looking) print of your photo on whatever surface you choose. In this case, I chose tin foil, although the technique will also work with many other waterproof materials such as wood, hardboard, or even tile.
Phototransfer Tutorial-6


The Materials

Phototransfer Tutorial-1
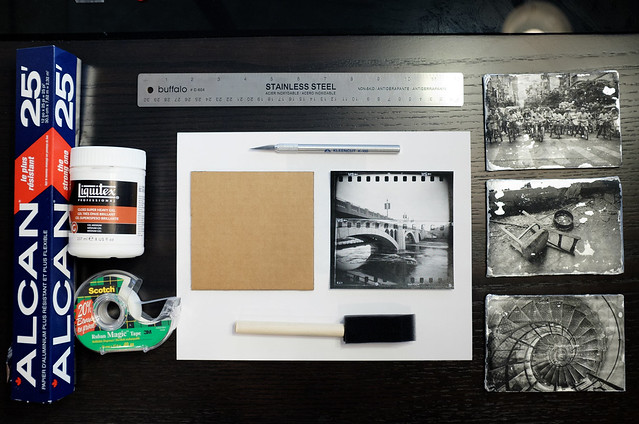
The materials list is what you see above, plus a sponge which I forgot to include in the photo.

- an exacto knife (or scissors)
- a ruler
- a print to transfer*
- cardboard
- tin foil
- scotch tape
- acrylic gel medium**
- small foam brush
- beer (optional)

*The Print to be transferred: Ideally, your print should be toner based, so something that came off of a laser printer, or a photocopier. An inkjet print doesn't work well. So if you have a photo you really like, get it printed and photocopy it, and that will serve as your print to transfer. If you can, you should also flip the image horizontally, or else you it will transfer backwards onto your surface. This is fine for most things, but any words or text will obviously be backwards.

**Acrylic Gel Medium: You can get this at Michael's or any local art store. I bought a small 8oz bottle of Liquitex Gloss Heavy Gel Medium. This would be sufficient easily for 50+ prints, by which time you will have bored of this technique. So no need to buy a huge bottle. Unless you want to huff it to get high. Then buy whatever size you require. Disclaimer: I don't condone this.


The Process

1) Use the exacto knife and ruler to cut your final print to the size you want. Doctor's note: cutting your fingers may be deleterious to your health.

2) Cut a piece of cardboard (flat, with no folds or bends) to the same size. Previous Doctor's note applies.

3) Wrap the carboard with tin foil, as if wrapping the most precious of X-mas gifts. You want as flat and smooth of a tin foiled surface as possible to work with. Tape down excess foil onto back side. Pretend you are trying to impress your significant other with your mad wrapping skillz.

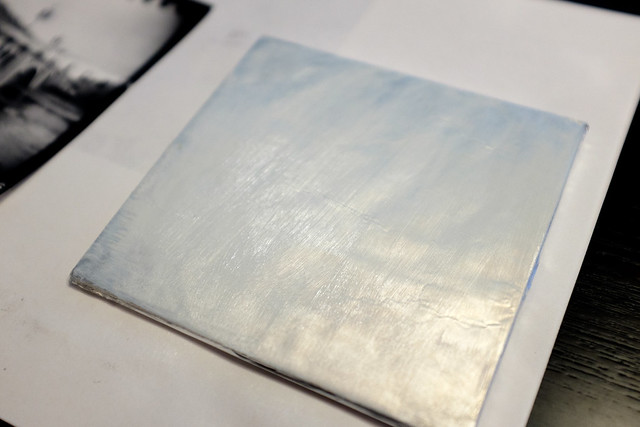
4) Use the foam brush to apply an even layer of the gel medium to fully coat one side of the tin foiled cardboard as per photo below:
Phototransfer Tutorial-2
You don't want to be cheap here with the gel. Apply a healthy dose, and spread it as evenly as possible. Like you're icing a cake. Or mudding drywall. It should be fairly smooth. Too much coffee, or beer from your advent calendar, may be detrimental to this step.

5) Place your print (face side down) onto the tin foiled cardboard. Smooth out any air bubbles, and flatten the print to ensure complete contact between the print and the gel. Try to avoid getting any gel onto the back of your print. Or your hair, or all over your table. Your significant other will be impressed by your wrapping skillz, only to be irritated by the sticky mess you left behind.

6) Allow the print+gel surface to set for at least half an hour. Patience is a virtue. Grab a beer. Drink said beer. Who says patience doesn't have a pay off?

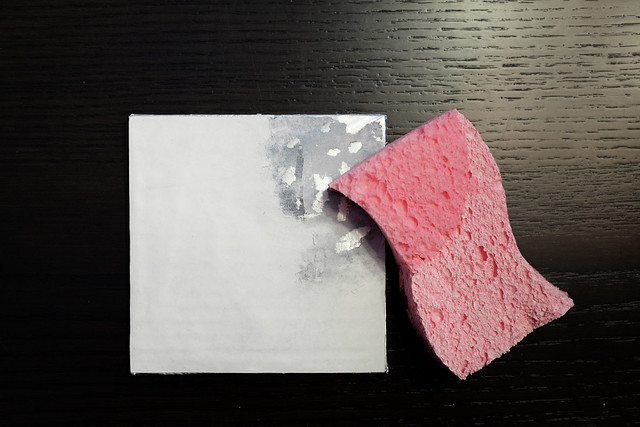
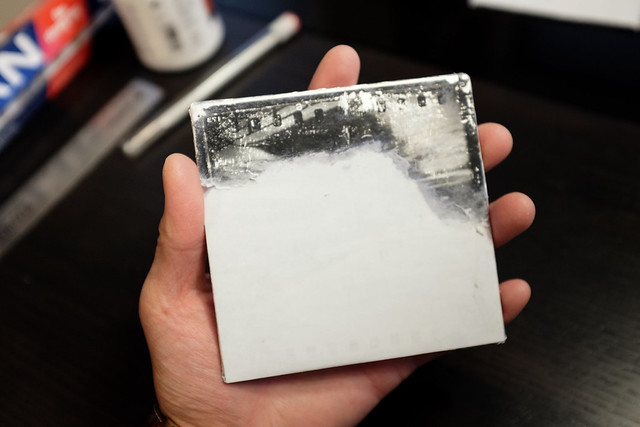
7) Once the print+gel has dried/ set onto the tinfoil, dampen a sponge, and begin gently soaking the back of the paper print. I start with a small area and allow the paper to soak up some of the water from the sponge. Then gently rub in circles (use your finger if you want to be more delicate and gentle) to wear away the moistened paper, to reveal the transferred print underneath, as per photos below:
Phototransfer Tutorial-3

Phototransfer Tutorial-4

Phototransfer Tutorial-5

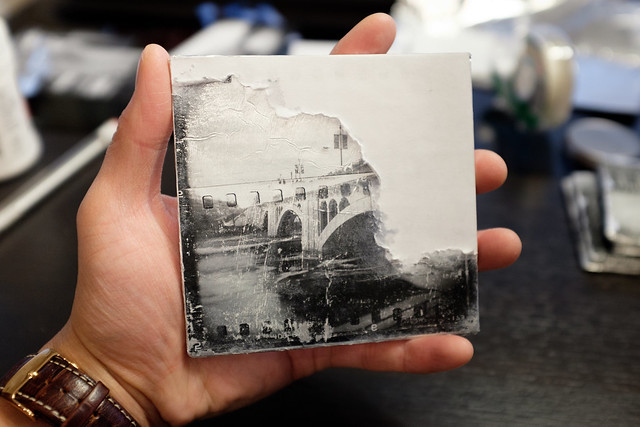
Tips for success: the more even you spread your gel, the longer you allow your print to set, and the gentler you are with the sponge, the higher degree of success you will have. I did this tutorial hastily (only one beer was consumed in the drying stage), so the image did not transfer as well as I would have liked, but the gritty imperfect result sort of works with the image. You can see my previous attempts to transfer photos to other surfaces here - MDF and wood and foil.

Good luck, and here's hoping you have some fun while creating one of a kind prints to give away.

Monday, September 7, 2015

The 70mm Rolleiflex (sort of)

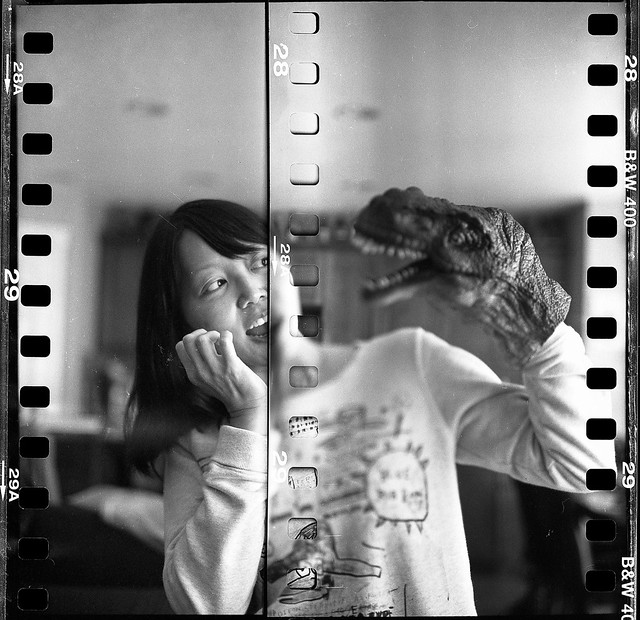
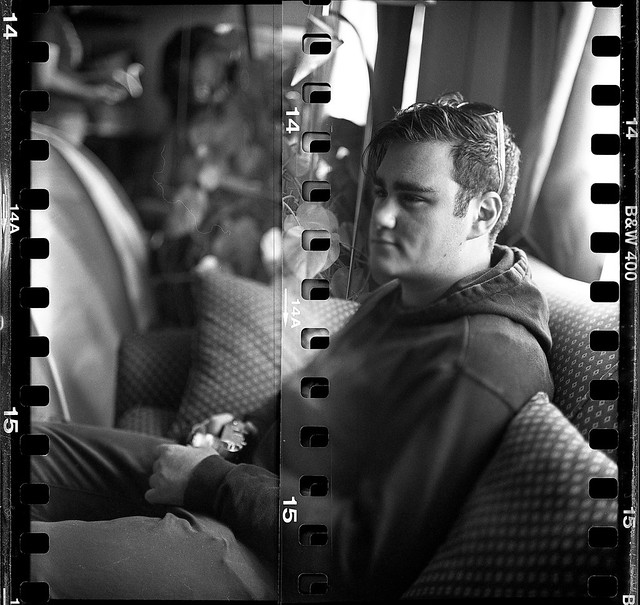
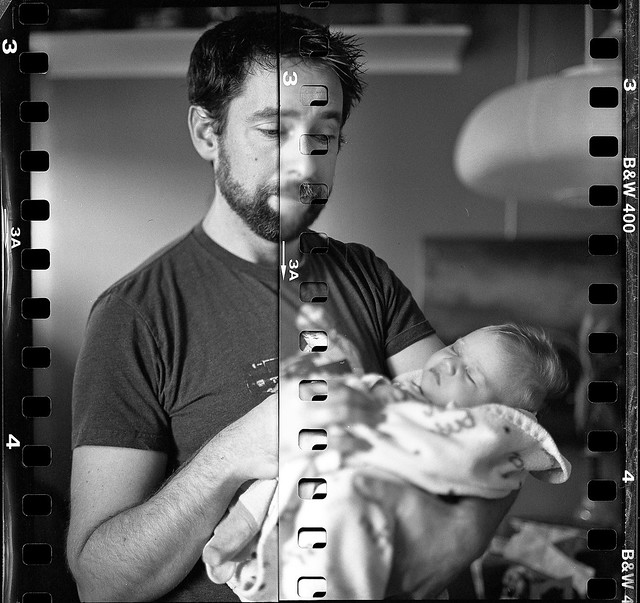
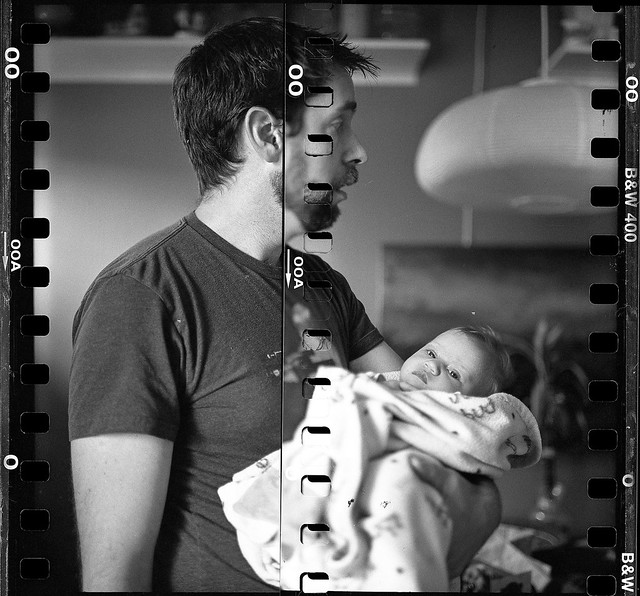
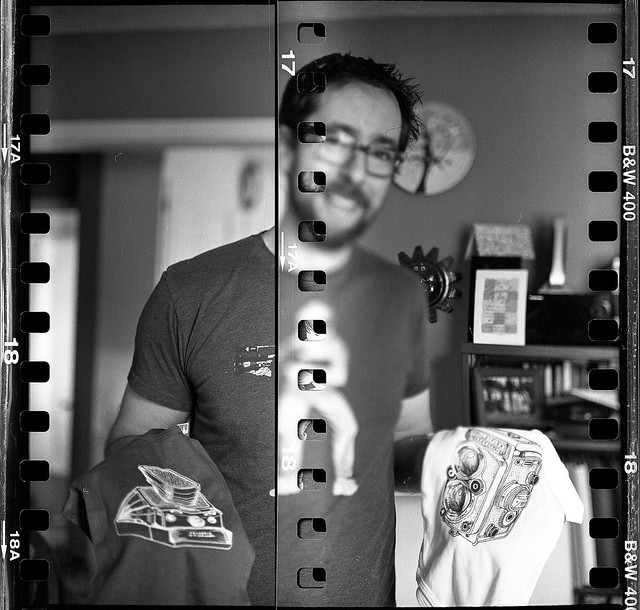
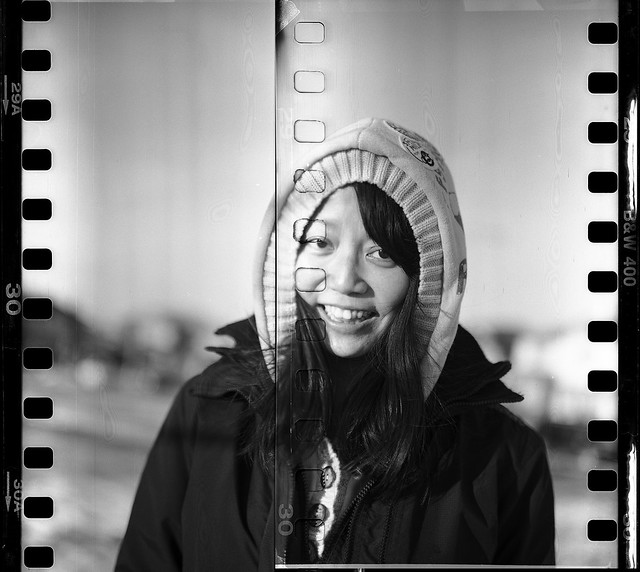
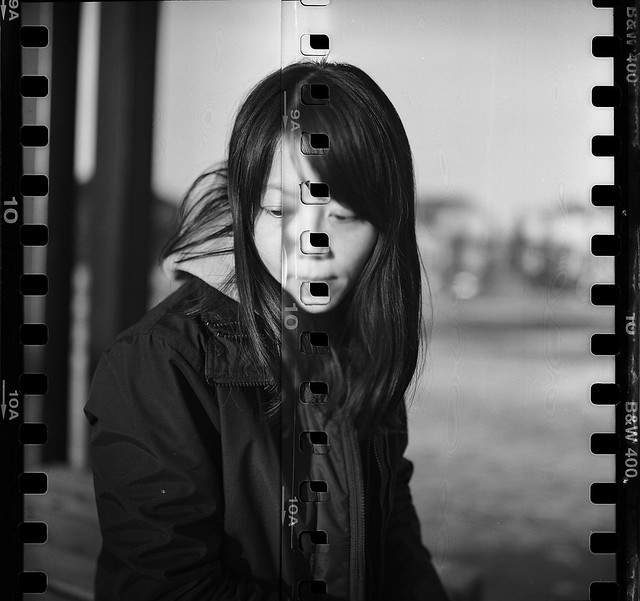
I spooled two rolls of 35mm film onto a single medium format film spool and shot them through the Rolleiflex 2.8E, generating this overlapping sprocket effect. Non-photonerds be like, 'Da frick you just say?' The focus is off in these pictures (explained below), but I love them regardless. What I learned shooting them: Anita doesn't know how to act terrified. That dinosaur hand puppet should instill far more pants crapping terror than what she's emoting.

The 70mm Rollei - Anita

The 70mm Rollei - Anita

The 70mm Rollei - Mike

The 70mm Rollei - Scott

The 70mm Rollei - Scott

The 70mm Rollei - Scott
The camera on the white onesie in Scott's hand is what I shot this set with.

So continuing with the photo nerd talk from above, the reason the focus is so weird down the middle in all of these shots is a result of the overlap in the centre. That extra thickness of the overlapped area causes the film(s) to shift slightly out of the film plane. It's not an exact science, but if you're interested in trying this technique out, I wrote up a short little tutorial last year here. Just be prepared for a little bit of frustration fumbling around in the dark (or film change bag) while trying to spool the rolls evenly.

All photos shot with the Rolleiflex 2.8E, on Lomo Lady Grey 400 film, developed in Rodinal, 1+24 for 5:00min at 68 deg. F.

Monday, January 20, 2014

Tutorial: How to shoot 35mm sprocket photos in a Rolleiflex

I've been eating painkillers and muscle relaxants like candy for the last couple days, after straining my back snowboarding. It wasn't as glamorous or epic as you would think either - I only got 1.5 runs in before it happened. Pathetic. Anyways, on to the photo goodness.

These shots were taken through the Rolleiflex TLR, but with 35mm film instead of 120. The whole process was a royal pain in the ass, but also quite fun if you're into shooting alternative film formats.

Rolleiflex Sprocketography

Rolleiflex Sprocketography

70mm Rolleiflex-1

Tutorial: How to shoot 2x 35mm film in a Rolleiflex TLR

1) Tape film leader from one 35mm roll onto 120 spool (butt the edge tightly to one side).
2) Tape film leader from a second 35mm roll onto the same 120 spool (butt the edge tightly to the other side of the spool, thereby fully covering the 120 spool end to end. The two rolls will overlap in the middle.
3) Move operation into a film changing bag (no light!)
4) Fully spool both rolls of 35mm film onto the 120 spool, and remove the 35mm cannisters with scissors. This will leave you with 2 loose ends of film hanging off the spool.
5) Tape the loose film ends onto a 120 takeup spool, butting up against both edges to fully cover the entire width.
6) Load the take-up spool and the feed spool into the Rollei as per normal 120 film. Note, do NOT feed under the metal roller to trip the film counter. This way, you don't waste any film advancing to the number 1 frame as you would do for 120.
7) Close up back, and fire away! You just have to guess how much to advance before your next shot.

Questions? Drop me a line in the comments.

Sunday, January 12, 2014

Tutorial: How to Shoot Instax Mini film through a Rolleiflex

This is a quick tutorial on how to shoot Fuji Instax Mini film through a Rolleiflex TLR (no hack required). Non photogeeks can skip the text here and just look at the pictures.

First: Why bother?! Yes, you can just buy a Fuji Instax Mini camera and fire away. But those don't give you manual controls, you work with slower lenses, and you have no control over the onboard flash. Using a Rolleiflex means full manual control, Zeiss glass, and access to any lighting setup you want via flash sync (if you want).

Things you will need:
-A pack of Instax Mini Film
-A Rolleiflex or other TLR.
-A dark place, or light tight film changing bag
-A set of rollers to run your print through

Steps to shooting instant awesomeness through your Rollei:

1) Place Rolleiflex and Pack of Instax film inside a film changing bag
2) Manually eject the dark slide from the Instax pack (use your fingers and gently guide it out the side)
3) Manually eject one exposure in the same way.
4) Open up the back of the Rollei, and place the instax exposure in the back, where film would normally sit to be exposed, then close up the back. Note - orientation is important. What you think of as the 'back' of an instax photo is the light sensitive part. So the 'back' of the print needs to face forward when inside the camera.
5) Take Rollei out of film changing bag, and expose as normal. Box speed of Instax Mini film is ISO 800.
6) Return Rollei to film changing bag, open back and remove Instax exposure.
7) Run the Instax exposure through rollers to squeeze chemicals out to start developing. This is a clumsy process, so I cheat - I reinsert the exposure into a pack of Instax film, and then eject the exposure through a Diana Instax Back (it pushes the exposure out through a set of rollers triggering the development of the print evenly). You can get away without this, but it will be harder.
8) Watch in awe as image magically appears before you eyes.

Repeat.

*In case it wasn't clear, all handling of the Instax film (loading, unloading, etc) MUST be done in the dark (film changing bag or a completely darkened room). This is a pain, and is not convenient. But INSTANT PHOTOS! FROM A ROLLEIFLEX TLR!

The Rolleiflex Insant Camera
Above: Cactus Trigger, and Nikon SB800 (hidden behind me) bounced off the ceiling.

Below: No speed light. Bathroom incandescent lights were the sole light source.
The Rolleiflex Insant Camera-2

If you still have questions, drop me a line in the comments.

Update: I googled and found everyone links to a page that shows a 'hack' for a Rolleiflex TLR with a tintype back. Note, there really is no need to hack your Rollei - you get the same result this way by simply placing the film inside the regular back of the camera. The only difference is that the tintype back will ensure your Instax frame will be consistently straight and upright (no tilt). You can get similar results simply by using some gaffers tape along the inside edges of your rollei to create a sort of guide rail that you would just butt your Instax frame's edge against before closing the back up.

Saturday, November 17, 2012

Rummel Lake: Through the Viewfinder

One of the best parts about shooting with a medium format film rig like the Hasselbald (or in my case, the poor man's Hasseblad - the Kiev88) is the ability to use a waist level finder. Rather than bringing your camera up to eye level and looking through a small pentaprism or a digital LCD, you get to compose your shot by looking down on the scene as it enters your lens and is projected upwards onto a focussing screen. The first time people see this, they often think they're looking at a digital image, which it's not. I know the first time I encountered this on a Mamiya twin lens reflex camera, I felt like a caveman seeing his first TV - 'What kind of charlatan sorcery is this?!'

Shooting with a WLF takes a bit of getting used to, as the image projected is right side up, but inverted left to right. It really forces you to slow down and think about your composition (you have to check the digital mentality of 'shoot first, edit later' at the door). While this may not be convenient for fast moving scenes or subjects, you will learn so much more about photography and composition this way than just by snapping a million photos and hoping one turns out.

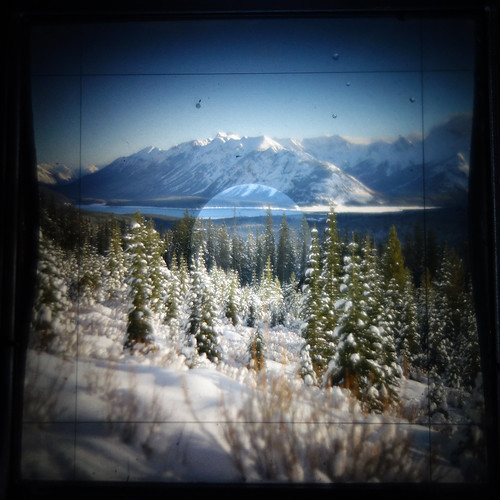
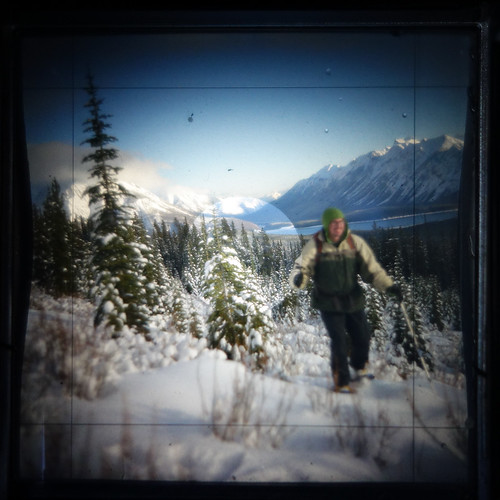
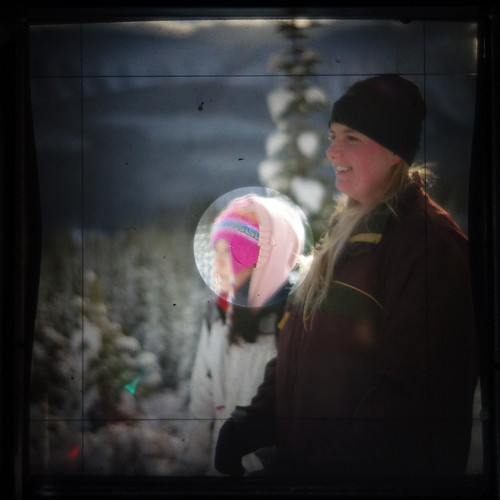
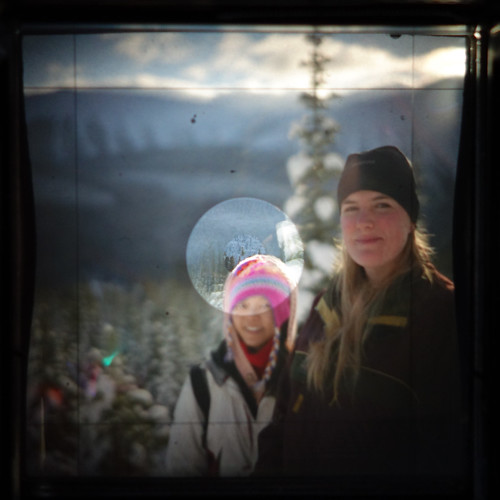
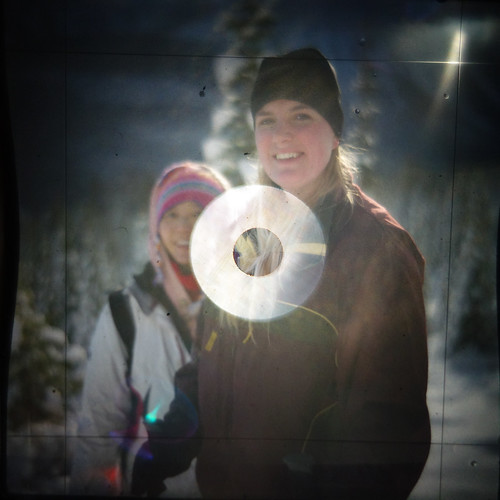
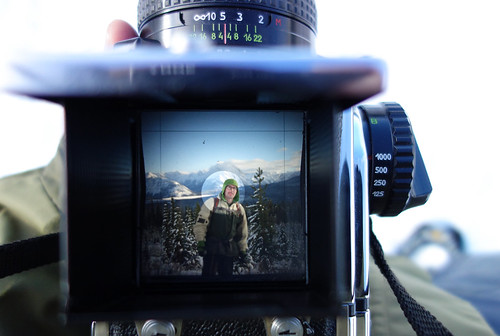
Sorry to get all preachy on you. The point of this post was to show you some images shot through the viewfinder (TTV) of my Kiev last weekend, while out snowshoeing. For you newbie photographers, TTV is a technique where you use one camera to shoot a scene through the viewfinder of another camera. If you want a visual of how to do this, see the last photo - point digital camera down at the WLF of another camera. It's THAT simple, and also gives you some interesting images that you don't have to 'filter' with Instagram or other crap to make it look 'vintage'. The scratches, dust, and other imperfections in the focussing screen all show up on your TTV shot.

Rummel Lake TTVs

Rummel Lake TTVs-5

Rummel Lake TTVs-4

Rummel Lake TTVs-3

Rummel Lake TTVs-2

Rummel Lake TTVs-6

If you feel you need a bit more instruction on how to shoot TTVs, drop me a line in the comments. Cheers!

Sunday, September 16, 2012

Lightpainting: G.Mach's two minute tutorial

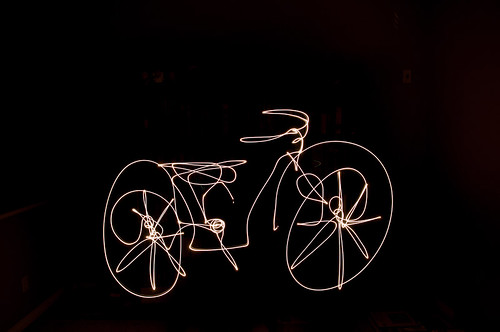
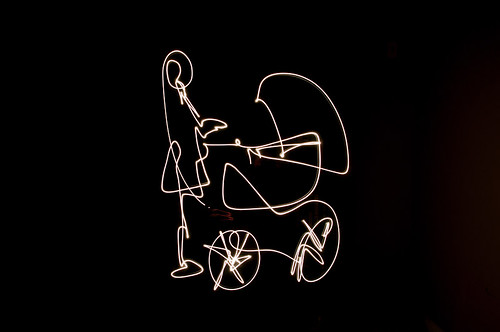
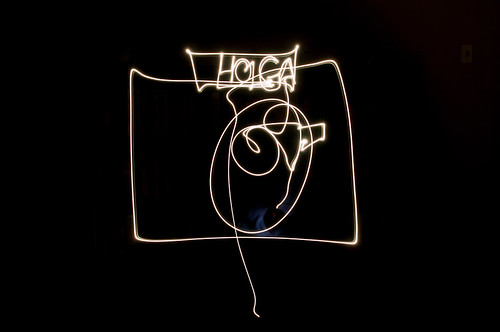
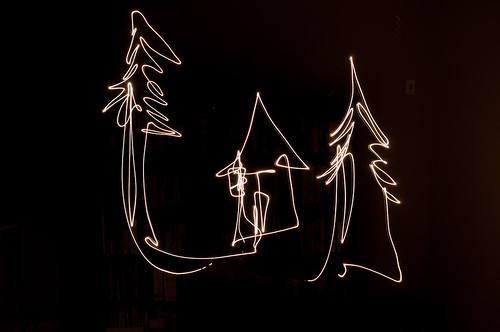
A friend asked me about light painting, and I got a bit intrigued, having never done it myself. So I figured, it's 2am, what the hell, let's give it a go. I'm sure folks in the neighbourhood seeing the rave-ish lightshow through my window were thinking, 'That Asian kid is on THE ECSTASY again'... whatever. That's about as close as this middle class yuppie will get to being a misunderstood artist. So after two minutes of set up, and a couple tweaks, I doodled off a few random things with my 'laser' (flashlight) for funzies. I also made an attempt at the USS Enterprise, but it turned out more like a flying sperm whale, so I didn't post it.

Light Painting-3

Light Painting-4

Light Painting

Light Painting-2

Quick tutorial

Gear:
-Camera with self timer, long exposure mode, and (preferably) manual focus
-Maglite with front hood removed (or any small point LED light should suffice)
-Tripod or other surface to set camera on

Instructions:
-Set up camera on tripod and self timer for long exposure
-Prefocus on where you will be drawing from
-Turn out lights
-Start long exposure (I did between 20 - 30 seconds)
-Face camera and draw with light

I don't think this needs to be said, but just in case, you want to do this in darkness, or your effect will be greatly diminished.